

Creating an Android app involves several steps, and one of the most important aspects is the debug key. These certificates serve to authenticate your app while it’s being developed. However, they do have an expiration date, which can cause issues if not managed properly. But there’s no need to panic – in this guide, we’ll explain everything you need to know about expired debug Key and how to resolve the problem effectively.
Common Issues with Expired Debug Keystore
When your debug keystore expires, the first thing you’ll notice is that you can’t install or update your development APK files anymore. The mismatch between the new and old keystore leads Android to reject the installation of APKs. This issue can also impact Android Virtual Devices (AVDs), potentially stopping you from running your app simulations.
How to Check If Your Debug Keystore Has Expired
You can check the expiration of your debug key using either the command line or Android Studio.
Verifying key expiration via Command Line:
Execute the following command to verify the validity of your keystore:
Using Android Studio:
- Open Android Studio.
- Navigate to your project.
- Go to “Build” -> “Clean Project.”
- Android Studio will notify you if the debug Key has expired during the build process.
Deleting Your Debug Key by Command Line
Deleting your debug key is the first step in resolving expiration issues. Depending on your operating system, the process may vary.
For Linux and macOS:
- Navigate to the
.androidfolder in your home directory using the following command:rm ~/.android/debug.keystore
For Windows:
- On Windows, the
.androidfolder can be found in%USERPROFILE%. Use the following command to delete the file:del %USERPROFILE%\.android\debug.keystore
Manually Deleting Your Debug Key: A Step-by-Step Guide
Open Your File Manager:
Start by opening the file manager on your computer. This is where you can browse through your folders to locate the files you need. For Windows users, this will be File Explorer, while macOS and Linux users will use Finder or a file manager such as Nautilus.
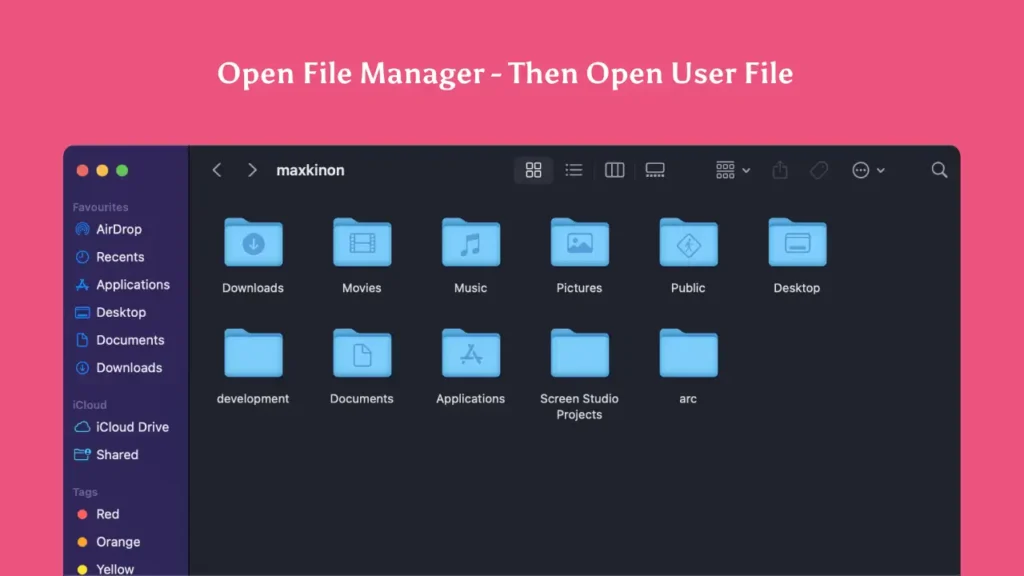
Navigate to Your User Folder:
With your file manager open, head to your User folder. This folder is named after your username and contains most of your personal files. On Windows, you can find it at %USERPROFILE%, while on macOS and Linux, it is located in /home/username/.
Show Hidden Files:
The .android folder, which contains the debug keystore, is hidden by default. To make hidden files visible:
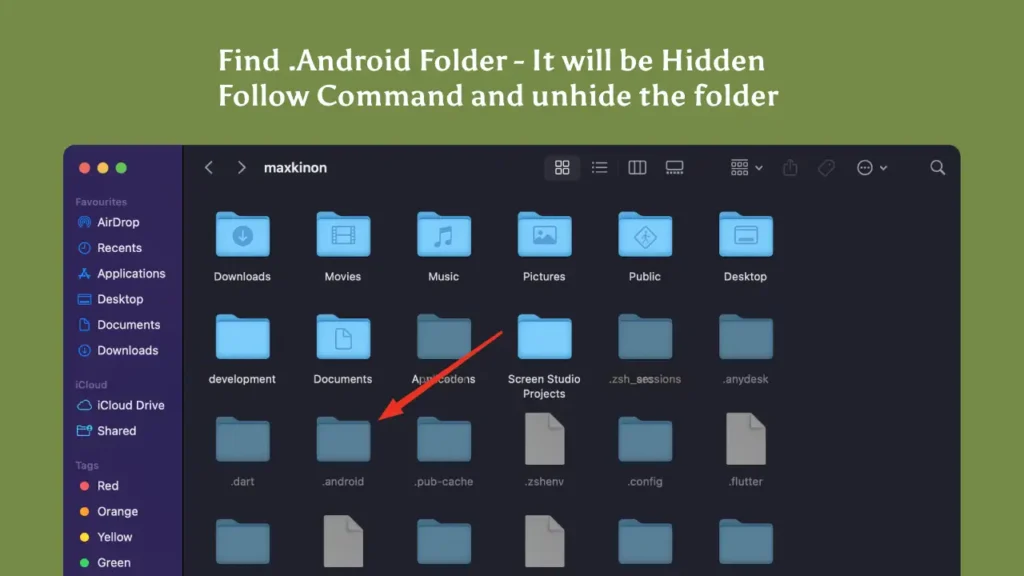
- On macOS and Linux: Press Shift + Command + . > (period) to show hidden files and folders.
- On Windows: Click the “View” tab at the top of the File Explorer window, then check the “Hidden items” checkbox to reveal hidden files.
After revealing hidden files, search for the .android folder. This is where Android development files, including the debug keystore, are kept.
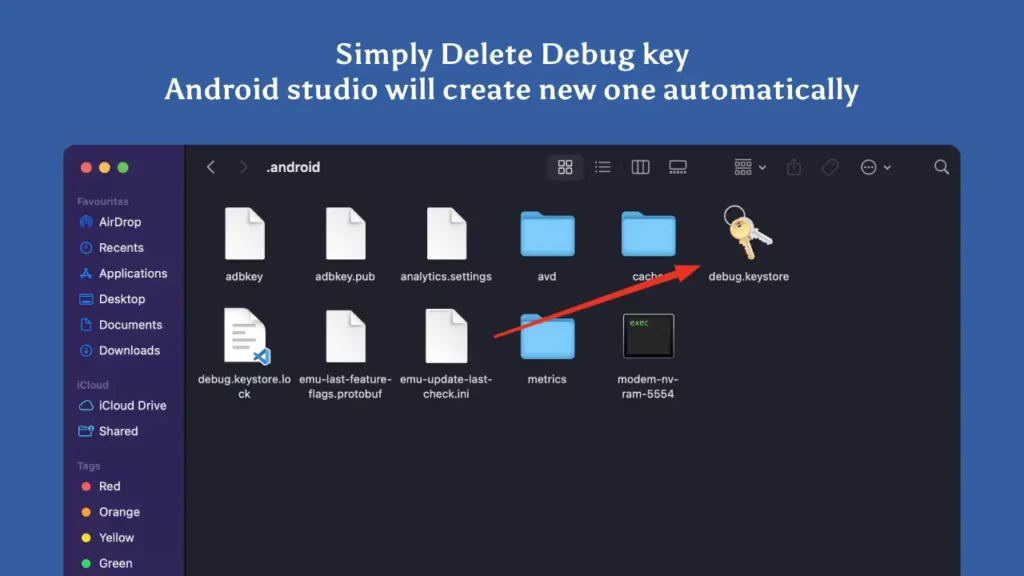
Delete the Debug Keystore File:
To delete it, right-click on the debug.keystore file and choose Delete. Alternatively, you can select the file and press the Delete key on your keyboard. This will remove the expired debug Key.
What Happens Next:
After you delete the debug.keystore, Android Studio will automatically generate a new debug key the next time you build a project or create a new app. You won’t need to generate it manually unless you wish to customize the certificate settings.
How to delete dubug key a video guide
After you delete the debug.keystore, Android Studio will automatically generate a new debug key the next time you build a project or create a new app. You won’t need to generate it manually unless you wish to customize the certificate settings.


Comments 1
This guide is very helpful. Thank you Maxkinon Team